
Fridays Kuspuk Power Point Presentation
Welcome! This page will constantly be under construction. If you have sewing questions please feel free to contact me with questions through the blog. The blog reaches my email; I check that daily if I have internet capabilities. I will gladly answer questions.
You will find additional information for kuspuks under the kuspuk pattern drop down menus.
Most of my instructions below will include sewing specific terms in bold print.
Thanks for checking!
Sewing Pattern Tips / Applies to all sewing patterns…
Don’t Trim Off the Seam Allowances……
Each pattern piece can be likened to a jigsaw puzzle piece. If you alter the puzzle piece it will no longer fit the puzzle. If pattern pieces are not placed on fabric as designed, the pieces will not fit as designed.
For example: do not cut off seam allowances in an attempt to reduce a size. Remember that “jigsaw puzzle” analogy above? Sewing patterns provide you with a template for fabric cutting. Ideally, a well designed pattern has pieces that fit together perfectly (assuming you are following the designer’s instructions.) A finished garment is a 3 dimensional, wearable jigsaw puzzle. You cannot shrink a puzzle just by trimming down the perimeter of each puzzle piece. It just does not work mathematically that way. The same applies to sewing patterns. Adjustments are typically made within each piece. It is complicated to explain in a paragraph. Maybe I can offer a tutorial on pattern alteration sometime in the future….
For Garment Sewing: Take Accurate Measurements to Determine Pattern Size Needed
Step 1: Take all of the recommended measurements. Shirts, for example, require bust (or chest for men) and hip measurements. Pants or skirts typically require waist and hip measurements. (Tailored garments require additional measurements…)
- Make sure your measurements are as exact as possible. Wear snug fitting clothing for this process. Do not add extra inches.
- Compare your measurements to the measurements provided on the pattern package and choose the size or sizes closest to your measurements. If you are using a multi-sized pattern this could be easier. Most people are a combination of sizes. I’ll eventually have instructions here regarding multiple sized patterns. But, for now you can scroll through photos on my Facebook page and find good tips there about this.Jodie’s Sewing Studio Facebook Page
- Realize that “ease” is designed into a garment. Think of it this way: “ease” is the extra fabric in a garment that allows you to move easily; it is the difference (mathematically) between your body’s measurement and the amount of fabric at that measurement point in the finished garment. For example, a pajama pant pattern might have 8″ of ease designed into the hip of the garment so the pant is loose fitting. This ease is usually visible on the pattern’s illustrations or photographs. If you want the finished garment to fit the way the illustrated garment fits, trust your measurements.
- Realize that the pattern pieces always look HUGE. Each piece has ease, seam allowances, hems and possibly casings designed in. Also, each piece is FLAT. We are not flat…. we are sort of round…. We look much larger flat…. trust me…
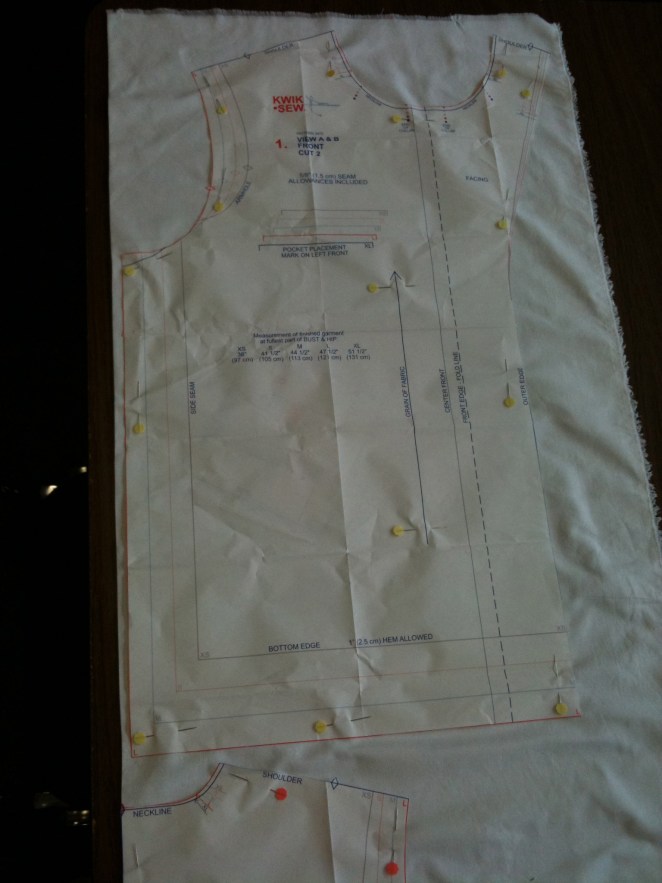
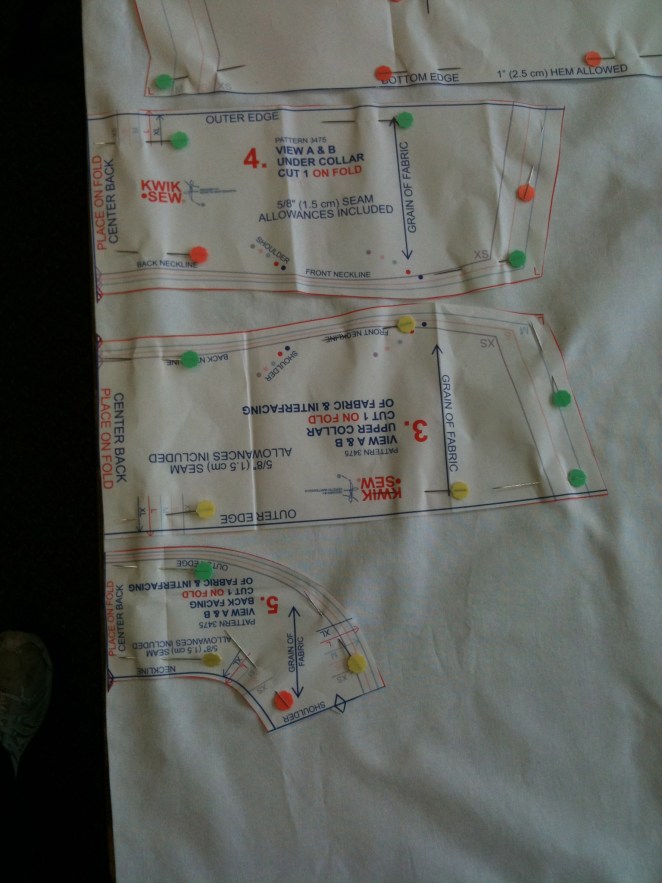
- I suggest studying each pattern piece first. Look for all markings and notches. Look for identifying information such as: inside leg seam, 1″ hem allowance, center front, center back, Front, Back….. This may seem silly… but, mark all of those “labels.” I promise you, if you do this, the instructions will make so much more sense to you if you familiarize yourself with the identifying information first…
Layout Steps
- Fold fabric according to pattern instructions. Usually patterns come with diagrams illustrating this procedure.
- Lay out ALL pieces according to illustration on instructions. Paying attention to selvages and grain of fabric is critical for garment sewing. Properly fold fabric prior to pinning and cutting: selvages must be parallel to the fold. The grain of fabric is parallel to the selvages. There is less give (stretch) in grain.
- Pin grainlines first. Grainlines must be parallel to the selvages or grain of fabric.
- Pin the top end of the grainline.
- Measure the distance between the pinned line and the selvage.
- Move the measuring tape to the other end of the grainline.
- Pivot the pattern till the other end is the same distance from the selvage as the top end. Pin.
- Pin the rest of the pattern pieces. Pins should be inside the perimeter of the cutting line and parallel to the cutting line of your size.


Hello, I have a quick question. Is the seam allowance built in to the pattern or do I add when I cut it out? Thank you, i cant wait to try it out!
LikeLike
Hi! The seam allowances are all included or “built in.” Thanks for asking and enjoy!
LikeLike
looking at your pattern got two different pockets is that just to pick choice?
I’m assuming you are referring to the children’s pattern? There are a couple of options for pockets. You can always design you own too. I hope this helps.
LikeLike